Facebook changed all Business Pages to the new Timeline design on March 30th– so now what? Now, I’m going to teach you where each feature is and how to use it, so you don’t need to waste your time trying to figure things out!
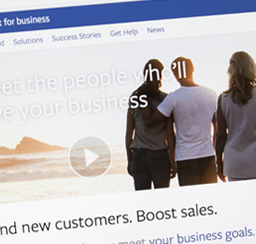
To start, let’s get an overview of the new Timeline design. As the name says, the Business Pages will look like a timeline and everything will display as such. The first big change is called Cover Picture. The Cover Picture is a big photo that will be featured on the top of your Business Page. While this is a great opportunity to better represent your business, it also can be a great disappointment if you don’t set it up the right way. To be sure you have a great design, choose a picture that represents your business and that will impress people, like a popular menu item, happy customers using your products or something remarkable about your business history. Remember: the Cover Picture is the first impression a customer will have of your business online, so pick something nice that makes sense for your business!
When choosing your cover photo, make sure you follow Facebook guidelines
– the picture CANNOT include prices, contact information, calls to action (“tell your friends”) or refer to Facebook actions (“like our page”). It also can’t have arrows pointing to the Like button or anything like that. “Covers must not be false, deceptive or misleading, and must not infringe on third parties’ intellectual property” either.
To make sure your picture is displayed correctly, choose a picture that measures 851 pixels wide by 315 pixels tall. If you are not a master in Photoshop and don’t know how to re-size a photo, there are two easy ways to do it:
1) By testing it: Use a high resolution picture in landscape orientation (horizontal) and upload it. Facebook lets you control the position of the picture, but it will not change the size. If you are in Preview Mode, no one will see the changes, and you can try it as many times as you want. If you already changed to the new design, hold off on trying too much – you don’t want to overwhelm your fans with hundreds of posts.
2) CutMyPic.com: this is a great online tool that helps you to customize your picture in 3 easy steps. Just go to www.cutmypic.com, upload your photo and click GO. In the second step, you’ll see the size information and other cool features you can use to modify your picture.
 To re-size your picture, use the selection in the ORIGINAL PICTURE window, and as you pull it, pay attention to what the Sizing Information says. To fit in Facebook’s Cover Picture, it should say 815px in the Width section and 315px in the Height section.
You can see how your picture will look like by clicking on PREVIEW. If the picture looks fine, click on DONE and go to the third and last step.
In step 3, you’ll save the picture on your computer. You can do that by clicking on the envelope icon (to email the picture to yourself) or on the floppy disk icon (to save the picture on your computer) – choose whatever is better for you.
ATTENTION: do not click on the Facebook logo – it won’t help you upload the picture. The Facebook logo is just an option for you to share your picture on Facebook.
Now that you know how to change your Cover Picture, you can do the same for your page’s Profile Picture. The profile picture needs to be 160 pixels by 160 pixels, and it sits 210 pixels from the top of the page and 23 pixels from the left. You can use one of the two options above to re-size your picture. The profile picture is as important as the cover picture since that is the image your fans will see every time you post something. It is also your identity so don’t change it too often. You want your fans to be able to identify you in between all the other posts they get – if they don’t recognize your profile picture, they might not pay attention to your posts.
The next item on your new business page that you should modify is the menu underneath your cover picture. This menu contains the most important information about your business (like address, phone number and hours), and it will be displayed in the top left hand side. Make sure all your info is correct.
 To change the About box info, click anywhere in the ABOUT box area. Then hover over BASIC INFO and the EDIT button will appear (in the top right hand side). Click on it and Facebook will take you to the Edit Page – the same panel you used to manage your page before.
Right next to the About box, you are going to see the Views and Apps area. This area contains all your old tabs. As you go to the Business Page, you will see 4 tabs. The photo tab is the first one by default, and you can’t change that. But you can choose the other 3 to be displayed. Also, you can change the image shown in each app, which is really great for keeping your brand identity and to create a nicer look.
To change the app’s image, click on the arrow right next to the fourth app underneath your cover picture. Then hover over the app until you see a little pencil in the top right hand side. Click on the pencil and then click on EDIT SETTINGS. A window will pop up. In this window you can add/remove the app, change the name of the tab and change the image. Click on CHANGE to change the tab (app) image. A new window will open, and you need to click CHANGE again. Facebook will then let you upload a picture. Choose the file you want to use and click on OPEN. Facebook will then display the picture you choose. You can close this window then. Back in the first window, click on OKAY. If you notice that the picture you uploaded is not the one showing up, don’t freak out – Facebook is having issues with it and the only way to get it right is to keep changing the picture until the right one appears.
Another thing you can do in the Views/Apps area is switch the apps that will  show up on the front page. Fans will still have access to all your apps (tabs), but you can control which ones will be displayed first. Note that, even though Facebook has 4 tabs on your Timeline, you are not allowed to move or change the tab Photos – it is there by default. You can, however, move all the other ones. To switch the tabs’ order, just click on the little pencil (same way described above) and then click on the tab you would like to make the switch for (see picture).
When you are done changing pictures and tabs, you should have a very nice looking page! But that isn’t all – there is a lot more to learn about the new Timeline Design. Stay tuned for more tips on how to keep your business on the cutting edge of social media marketing!