After creating and uploading a nice cover picture for your business page (see the article “Facebook Timeline Design: how to make your page look nice“ to learn step by step), you should work on your profile picture. The Profile  Picture is how users identify your post in the middle of all the other posts they get, so you need to make sure your profile photo is easy to remember and related to your business. The best picture for your profile would be your logo. If you don’t have one, choose a nice font and just write your business name. Also, when choosing a profile picture, take into consideration the Thumbnail, which is the name of the tiny picture that Facebook uses around the website and also the one that will appear in your fans’ newsfeed. It is important to consider your thumbnail because if your customers don’t know who is posting, they won’t interact with you.
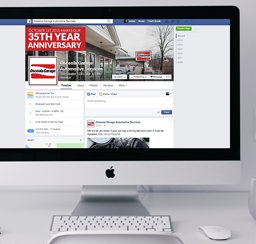
Take a look and compare the two Business Pages bellow. Which one do you think customers will be more interested in?


To make sure your profile picture looks nice, the photo should measure 180 pixels by 180 pixels (to learn how to check the size/pixels of your picture, see the article “Facebook Timeline Design: how to make your page look nice“).
Here is how you set up your Facebook profile picture:
1. Go to your Facebook page. Hover the mouse over the profile picture and click on EDIT PROFILE PICTURE. Then choose how you want to upload your picture:
-Choose from Photos: you will be able to go through your page’s Facebook albums to pick a picture
-Take a Picture: Facebook will use your computer’s camera to take a picture – not the greatest option for a professional quality picture, so I wouldn’t choose this route
-Upload your Picture: definitely the best option since you will be able to upload a picture with the right measurements.
2. After you’ve chosen and uploaded your picture, it’s time to edit your thumbnail. To do that, hover the mouse over your profile picture, click on  EDIT PROFILE PICTURE and choose the option EDIT THUMBNAIL. Once there, you will be able to reposition your photo or choose the option SCALE TO FIT, which will make your photo fit in the tiny thumbnail. Pick the option that better shows your photo and then click on SAVE.
Now that you have your profile picture all set to go, let’s learn about the pictures you post on your wall. Before the Timeline design, you could post any size picture to Facebook and they’d display a small version of the whole image on your wall. Now, you can still do that, but Facebook will show only a part of the picture. If you click on the picture, you will still be able to see the whole picture, but the chances of anyone doing that are minimal. To fix that issue, Facebook gives you the option to reposition the picture. To do so, hover the mouse over the picture and click on the little pencil that will show up on the top right hand side. Then click on REPOSITION PHOTO. Now you can drag the photo and move it as you want. When you find a spot you like, click on SAVE.
Another option you have is to upload pictures that are 404 pixels by 404 pixels – they’ll fit perfectly and you won’t need to reposition them.
The last thing you can do to make your page look nice is to change the pictures displayed on the tabs. You can create your own and they should measure 111 pixels by 174 pixels. To change the tab’s image, click on the arrow right next to the fourth app underneath your cover picture. Then hover over the app until you see a little pencil in the top right hand side. Click on the pencil and then click on EDIT SETTINGS. A window will pop up. In this window you can add/remove the app, change the name of the tab and change the image. Click on CHANGE to change the tab (app) image. A new window will open, and you need to click CHANGE again. Facebook will then let you upload a picture. Choose the file you want to use and click on OPEN. Facebook will then display the picture you choose. You can close this window then. Back in the first window, click on OK. If you notice that the picture you uploaded is not the one showing up, don’t worry – Facebook is having issues with it and the only way to get it right is to keep changing the picture until the right one appears.
You are done! If you followed all the steps I taught you, you must have a great, professional-looking Facebook Timeline page! Now, spend your time creating fresh content and engaging with your customers! And remember – it doesn’t matter how many times Facebook changes, the social network is still all about building relationships!